
And… it’s adorable!!! It’s not perfect & I definitely learned some stuff, like cake decorating is not easy, haha. Not even a little.
I’ve never ever made a Gingerbread House before but when I was scrolling my Twitter feed I saw the cutest Pink Gingerbread House & thought, “damn, that looks cute. I want to make one”!
I thought about making it from scratch but quickly decided for my 1st attempt I wanted to make it a little easier on myself so I went for store bought. And guess what, another “Accidentally Vegan” surprise! The Gingerbread kits from the ones I looked at were all animal by-product free. Candy on the other hand was a little more difficult. I went to my local Bulk Barn because they always have all of the candy AND they list all of the ingredients, which was super important & made the searching/choosing that much easier.
Here are some ingredients to watch out for:
1. Gelatin – sucks! Too many candies & just stuff in general has gelatin and it sucks. Basically gelatin comes from boiling water with animal bones, skin, tendons, and ligaments. It’s what makes Jell-O jello-y & what makes candy squishy.
2. Shellac – also known as glaze, Confectioner’s Glaze, natural glaze, or pure food glaze. It’s basically crushed up bugs that are used to give a shiny “glazed” finish to candies & baking toppings, etc.
3. Beeswax – this one is annoying like gelatin because you wouldn’t think it needs to be in there but it is. It’s often used as a coating in candies mainly.
4. Carmine – also known as Cochineal. This ingredient is mainly used for red candies and it comes from more crushed up bugs & beetles.
5. Lactic Acid – this one is a bit of a grey zone because a lot of companies might actually use a vegan formula naturally. It might have been cheaper for them to use the vegan formula or it was all they had access to, whatever not important but, it’s kind of hard to find out which they use. You can try reaching out to the company but they don’t normally get back to people. Lactic Acid is used as a food preservative mainly. Anyways, It’s time to build this pretty little Gingerbread House…
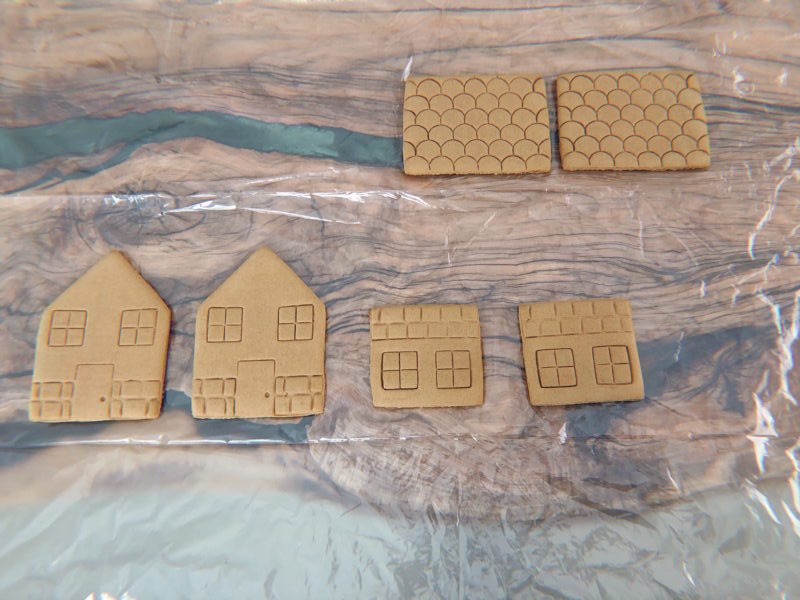
First, I laid out all of the house pieces to get acquainted with how they fit/work. One thing to note, the store bought pieces don’t break very nicely. You might have some patching up to do (I did). You could even try warming the gingerbread up first before cutting. Once I had my somewhat plan set I moved ahead.

I knew I wanted my main house to be pink so I used the pink squeeze tube with icing sugar that hardens, mainly used for cookies I guess. Once the big house was finished I did two other little houses in the pink as well. I saved some for decorating later.
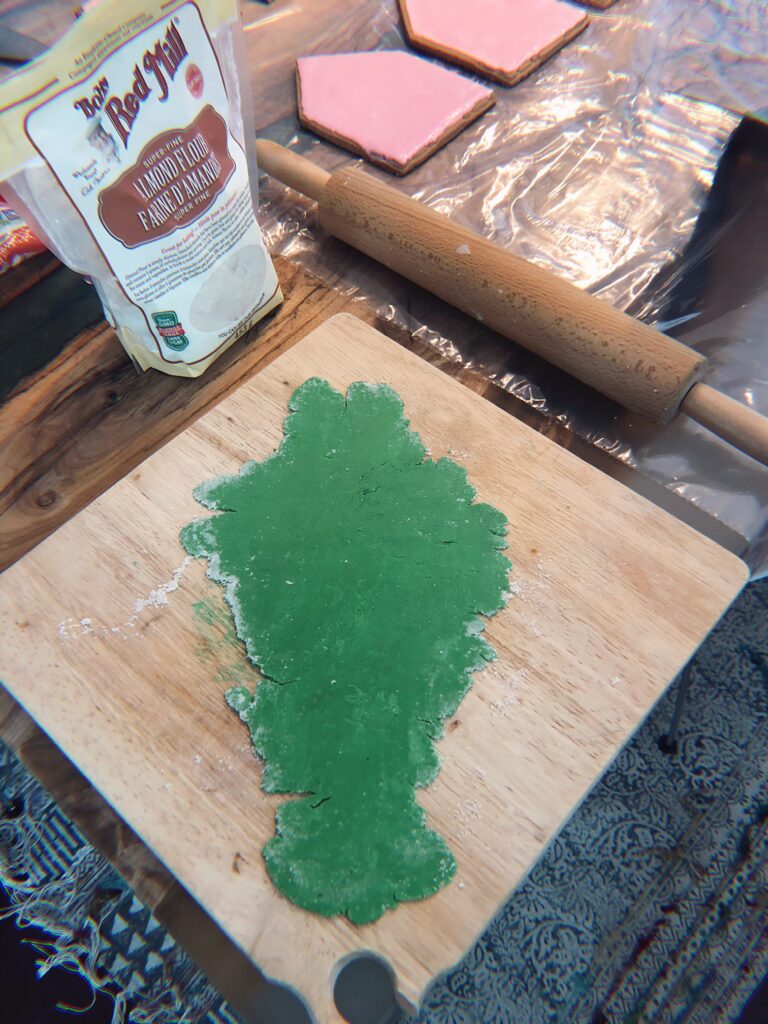
One of the packs came with a green fondant. Not in a green colour that I was planning on using. But I also bought some food dust in 3 colours, all pearl finishes, pink, purple, & white. So I thought maybe if I dusted the pearl white onto the green I could change the tone of the green & not have it go to waste.
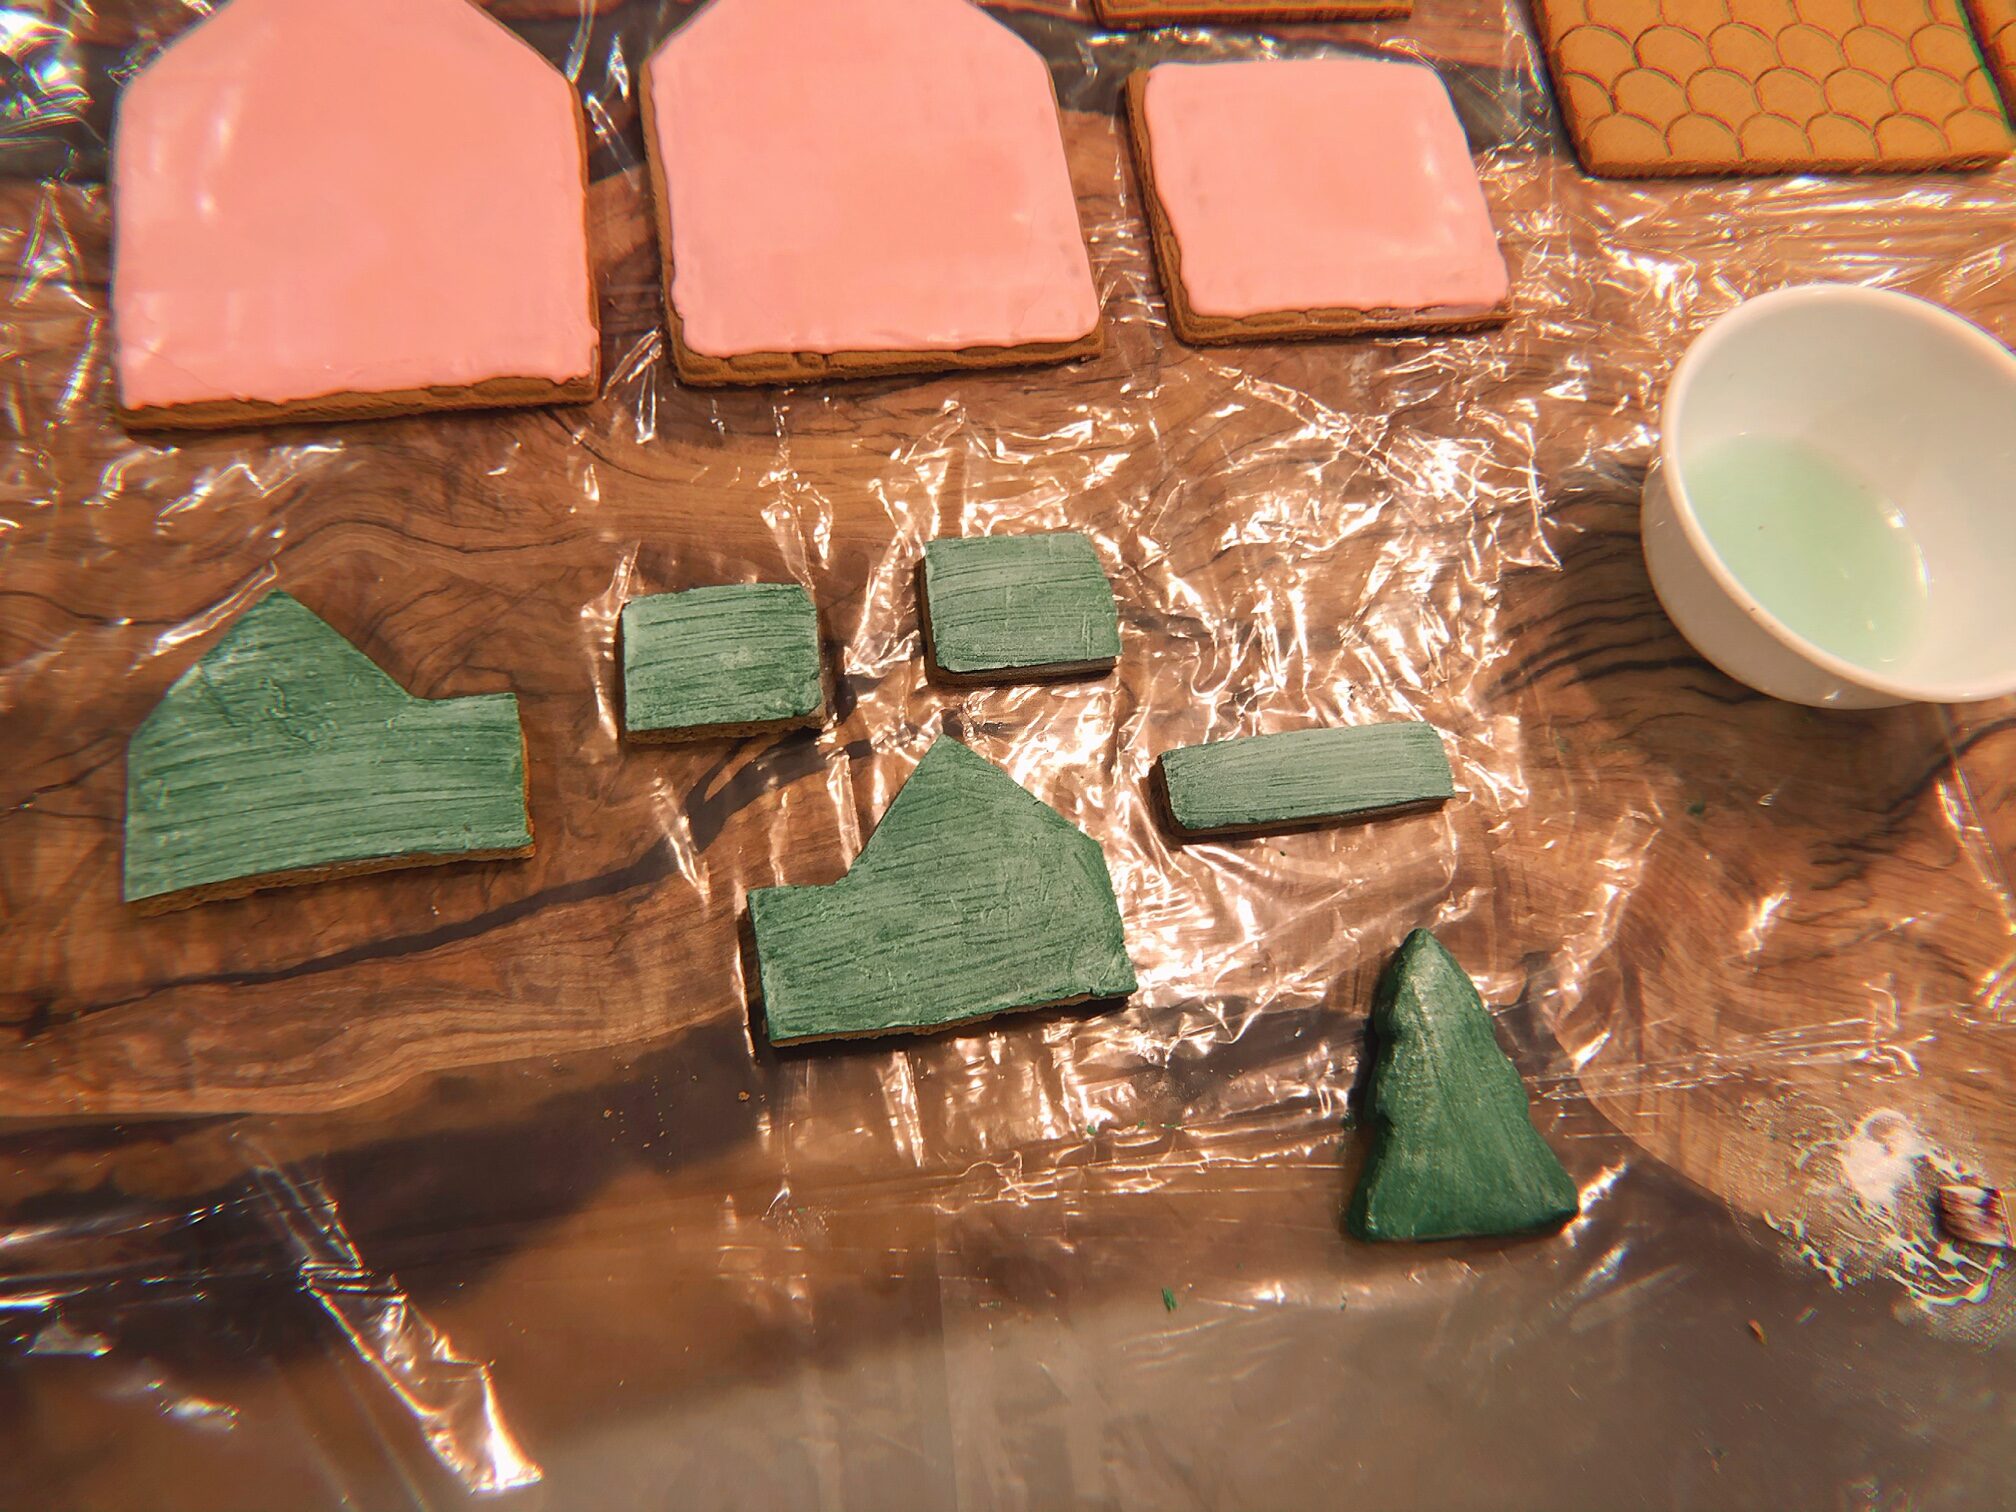
I’ve never rolled out fondant before but it’s not very easy haha. I’m sure this wasn’t the best quality fondant also but ya, it was hard! After I rolled it out I laid one of the little houses over it & cut around the pieces. Then I wet the cut fondant & stuck it to their matching house pieces. I had enough green fondant left over to do a Gingerbread Tree. Then I made a little wash with the white pearl food dust & water and brushed it over the green. After it had dried I used my finger to buff even more dust to really amp up the frost.
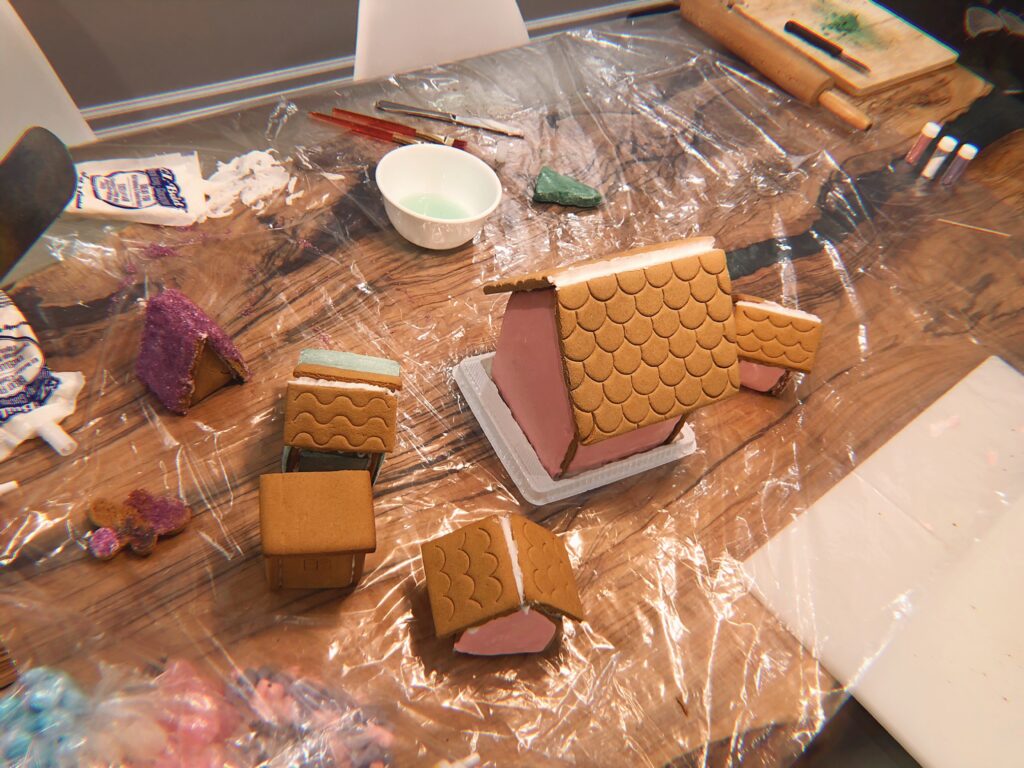
I left the icing & fondant dry before assembling them all together. I just used the basic white icing piped along the edges & put together all of the walls and the roofs last. Then I let them dry overnight.
The next day, I started the decorating process. I also asked for my mom to join in because 1. There’s so much to do & 2. I’ve never done this with her before so I thought it would be something fun and cute for us to enjoy together.
I started with the smaller village houses because I didn’t want to mess up on the larger house haha. I used some of the cake icing & different icing tubes and formulas to decorate the roofs, doorframes, & edges etc.
Something to note; the icing can get super thick & cake-y looking, I know, I know, it’s a gingerbread house and a lot of people cake that sh*t on but… I think if I did it again I would find more of that hard drying cookie icing or more fondant to decorate all the walls & rooflines. I prefer a cleaner more streamlined look myself.
After I finished toying around with some of the little guys, I moved onto the big house. I knew I wanted to use these little candy coated licorice pieces as bricks or stones along the corners & bottoms of the walls. So first I had to cut those in half & sliced down the middle to look like little bricks. Then I used the fluffy cake icing to lay the “grout” down. Using that icing as my grout/glue I brick laid the licorice candy.
And then guess what…
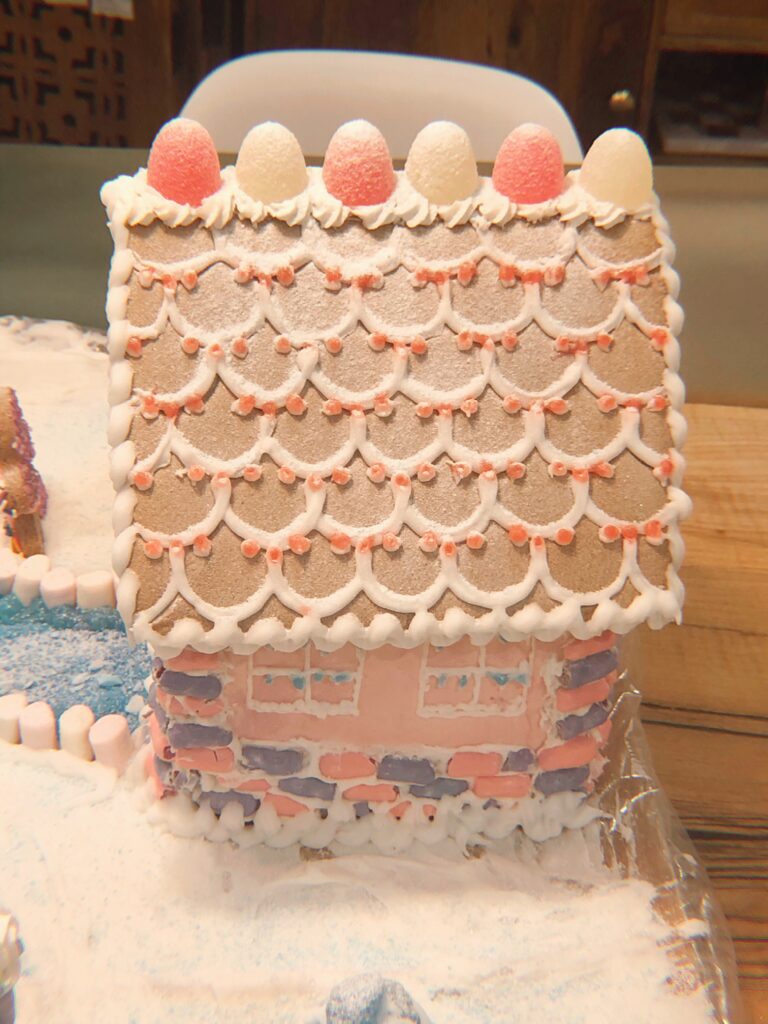
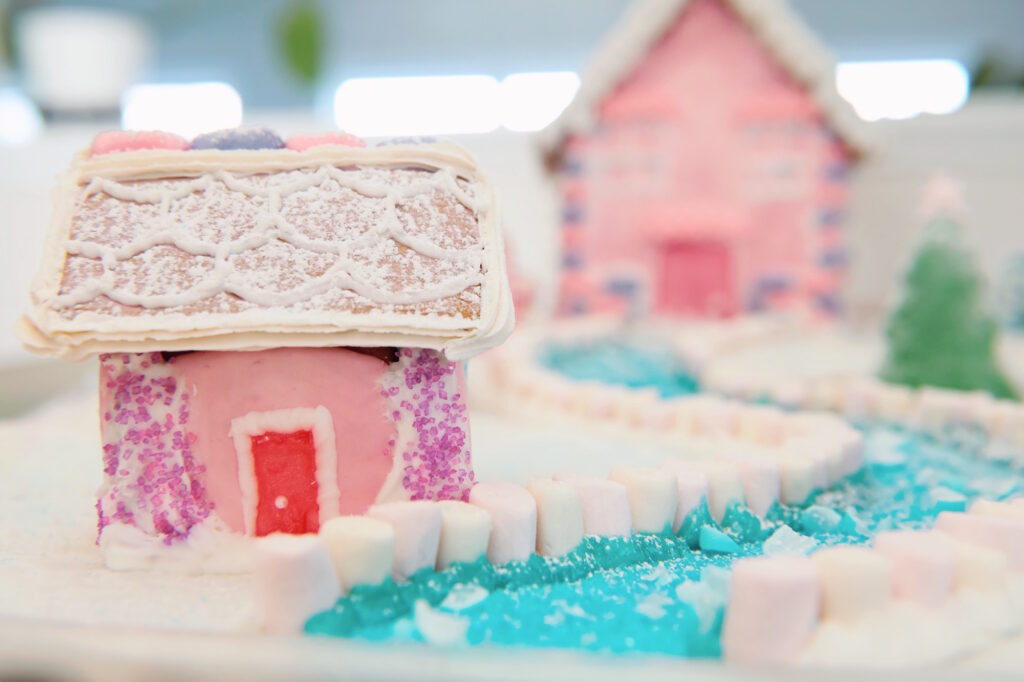
Literally as soon as I had completed all of those bricks, the house like imploded on itself and completely broke apart. Fortunately nothing was too damaged & I was able to salvage it. It just took waaaaaaaay longer than it should have. While the walls lay to dry I used the pearl white food dust to coat the roof & then used a thin line of white icing to scallop the roof. Once that all dried, I re-iced the entire house to stick together and it is currently drying over night, again. Hopefully for the last freaken time though!
Tomorrow I will place them all together and add all of the finishing touches. Ps. The two little homes my mom did are so cute. She killed it.
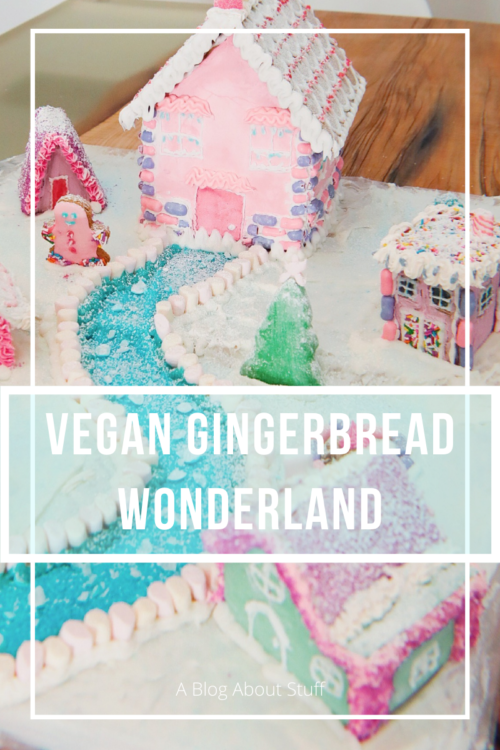
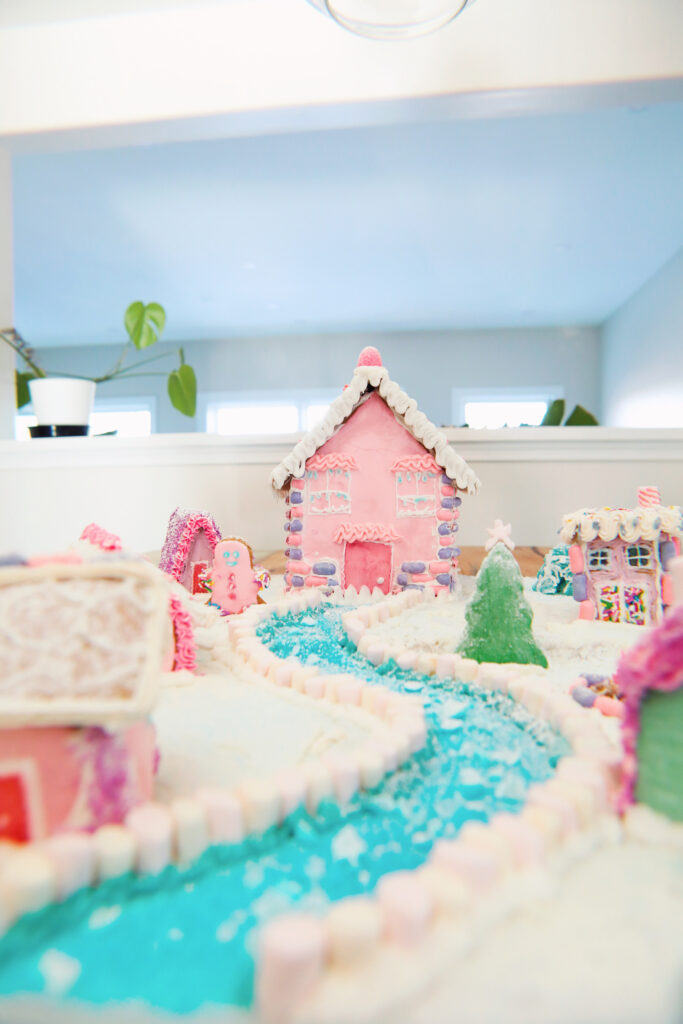
I’m officially finished. The 3rd and final day consisted of me putting “back” together the big main house & finishing it’s piping & touching up the “stone” façade. After all of the houses & décor items were complete I needed to find a big enough surface to place them all on together. I decided to use two large cutting boards with a clear garbage bag (which I will use when the holidays are over) over them so I could coat the “ground” in snow aka. fluffy icing. I didn’t have a ton of icing left over but I made it work.
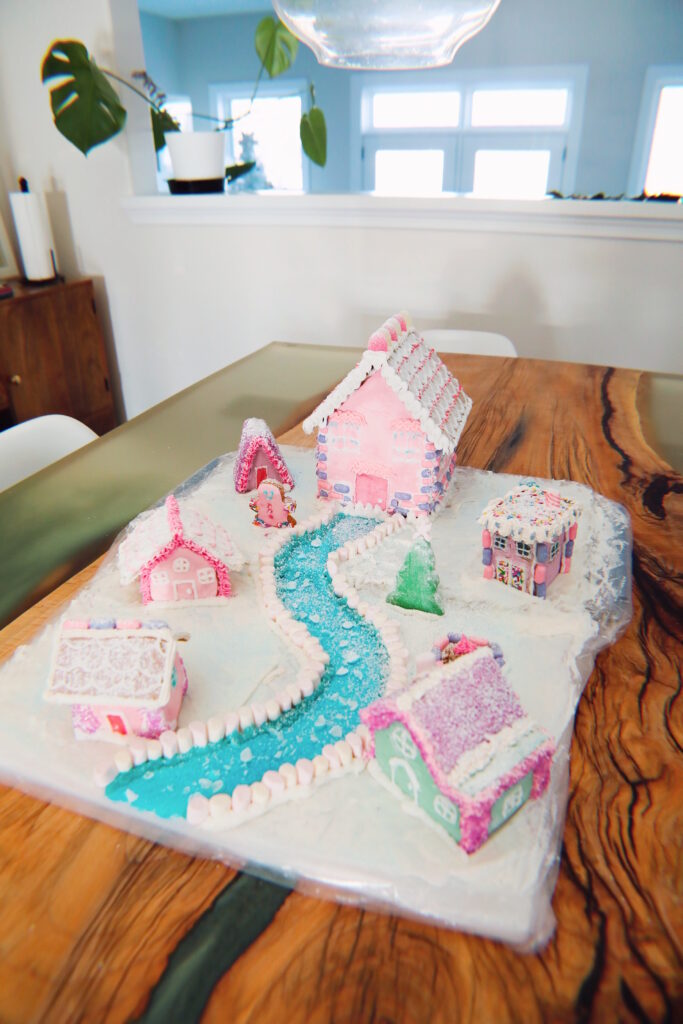
I knew I wanted the big house dead center with an icy path winding down the boards with the other homes scattered around the pathway. Once I placed the big house I used a silicone spatula to draw out my icy path and then filled it with blue icing. I placed the rest of the homes, lined the path with marshmallows, & added snow build-up along the edges of the homes. I had some menthol/anise hard candies that I ground up in my mortar to use as ice shards & then I ground it up even more to sprinkle all over for added snow/ice effect.
For the final touch I used powdered icing sugar through a sifter to create a fresh powdered snow effect. And voila! I’m very pleased with how it all turned out. Like I said, I severely underestimated how much work goes into this. If I do it again next year I think I’ll tray making it from scratch. I also know which toppings & icings work better than others. Have you ever made a Gingerbread House? How did that go? Haha! Would love to know in the comments down below.
A Vegan Gingerbread House & Village – First Experience

This is adorable! You did such a great job.
Your house turned out so cute! I’m impressed. That seems like a lot of work. 🙂
Too much work, haha. Thank you so much <3
I’m so impressed! Your gingerbread village is so cute. I love the pink.
Aw thank you! I’m happy with how it turned out too <3
Very cute! We’re going to make our gingerbread houses this weekend.
Fun! Hope you share some pics 😉
OMGosh your Gingerbread house is absolutely gorgeous and adorable too! I did one and let me tell you choosing one with the color red in it wasn’t a good idea lol I wish I had found this one out to do, yes there is a lot more to it. And you did a fantastic job at having it all layed out and everything.
Aw thank you. I can totally see why people don’t do this every year haha. It is not easy.
Very cute! I’ve never personally decorated a gingerbread house. You did an awesome job!
Thank you so much. It’s fun but maybe a house is an easier start haha.
Looks great!
TY
My mom is a cake maker and yes, fondant is a bear! Love your gingerbread house, it’s too cute!
I bet she has lots of fondant tips haha. And thank you <3
I got a lot of great pointers from this post. I’m excited to try it out!
Oh yay! I’d love to see it when you do <3
I have never done a gingerbread house. Yours look amazing!!!
Thank you so much! I never thought I would either haha.
Didn’t realize everything you mentioned were animal byproducts, but glad you’re scoring on the Christmas vegan finds! Awesome gingerbread house.
It’s crazy how many little things can be hiding in so many foods you wouldn’t expect them to be in. Thank you so much <3
Dude. This is the cutest li’l village ever! I love it! I buy gingerbread kits every year, but haven’t found vegan ones yet. This year I didn’t buy them because I couldn’t find any at the stores, so didn’t have to deal with it. But next year, we’ll see what I find! Thanks for sharing! And Merry Christmas!
Thank you!!! I think next year I will try making it from scratch. Either that or I’ll just make a door wreath instead haha. Merry Christmas love <3
Wow, you are really talented. I love the pink throughout the house. I can’t wait to decorate our gingerbread house.
Aw thank you! It is a fun little tradition.
Your little pink house, lol, came out adorably!
haha thank you. Pink is an easy colour to keep cute.
Very nice! That was a lot of work! I admire your industry.
Thank you! It was so much work haha.
Oh my goodness! This is soooo beautiful! Don’t eat it! Keep it forever! . Just masterful and pretty. The colors are just beautiful
I don’t think I could eat it haha. It’s so much sugar my teeth would break ;D
Thank you <3
Such a cute display! My daughter and I have done a gingerbread house each for awhile and it is so much fun!
I love that. It’s such a good activity to do together.
Your Gingerbread village is adorable! And how cool that you could do it vegan, love it!
Thank you so much. It was such a fun experience.
That is so cute! I am so glad there are more vegan options available!
Thank you, me too! Takes a little more effort but worth it.
I agree with you about the gelatin. It is in everything and usually derived from pork which we do not eat! But the house turned out adorable!
Thank you so much Tricia. I know gelatin is just hiding everywhere!
That’s the best gingerbread house I’ve seen yet!
Aw that’s so sweet of you, thank you so much.
So cute! And I can imagine cake decorating is difficult…maybe that’s why I’ve never attempted it, lol.
haha right?! it’s a craft for sure.
WOW! This is wonderful and vegan to boot! Thank you for sharing your masterpiece!
Aw thanks so much, I was definitely happy to finish it haha.
I made a gingerbread house…once! Yours is very cute.
haha that might be my future response too. Thank you so much.
Absolutely beautiful!! I love it! You definitely nailed the decorations! Merry Christmas!
Thank you! I really appreciate that. Merry Christmas to you too <3